

Install MongoDB on EC2 Instance — Solved Connection Issue From Public DNS

In this article, we will install MongoDB on an EC2 instance in AWS. Installing MongoDB on EC2 via aptitude is very simple. To install MongoDB on your EC2 Ubuntu system you can follow the official MongoDB-org package, which MongoDB Inc. maintains.
Prerequisites
AWS Account
Launch EC2 Instance
Pick any AMI (for this I am using Ubuntu 20.04), select the desired instance type, Storage, and configure the proper VPC, subnet, etc.
Create or pick an existing security group that has an SSH port enabled in the inbound rule.
Launch the instance by creating a new one or using an existing keypair. For detailed instructions on launching instances, follow the official documentation.
Install MongoDB on EC2
SSH into the server instance by running the following command: (Make sure your instance’s private key directory)
$ chmod 400 <keypair name> $ ssh -i ~/dir/<keypair name> ubuntu@<EC2 instance IP address>
Now, import a private key repository package for MongoDB to install on your server:
$ wget -qO - https://www.mongodb.org/static/pgp/server-4.2.asc | sudo apt-key add -
And add sources to your system:
$ echo "deb [ arch=amd64,arm64 ] https://repo.mongodb.org/apt/ubuntu bionic/mongodb-org/4.2 multiverse" | sudo tee /etc/apt/sources.list.d/mongodb-org-4.2.list
Update the package:
$ sudo apt update
Now you’re ready to install MongoDB on your system:
$ sudo apt install -y mongodb-org
You’ve successfully installed MongoDB on your system, let’s start the mongo service and verify:
$ sudo systemctl start mongod $ sudo systemctl status mongod
You can enable the service to start every time you reboot the system by running the following command:
$ sudo systemctl enable mongod
Here, you’ve successfully installed MongoDB on your Ubuntu Server in AWS.
Connect To Remote MongoDB Server
In this section, we’ll set up user authentication for Mongo so that we can read and write to the MongoDB server.
User Setup
SSH into the server and type mongo to run Mongo shell. For this tutorial, I'm gonna set up a user sagar and give read-write access to the example_db database.
use example_db
db.createUser({ user: 'sagar', pwd: 'my-password', roles: [{ role: 'readWrite', db:'example_db'}] })
Enable MongoDB access to all IPs
Edit /etc/mongod.conf file:
$ sudo nano /etc/mongod.conf
Look for the net line and comment out the bindIp line under it, which is currently limiting MongoDB connections to.
Note: do not comment out the bindIp line without enabling authorization, authorization can be enabled by un-commenting # security section and adding authorization: 'enabled'.
# network interfaces net: port: 27017 # bindIp: 127.0.0.1 <-- comment out this
security: authorization: 'enabled'
Open port 27017 on your EC2 server
Go to Security Groups of your instance.
Edit the inbound rule on your server's security group by allowing Custom TCP on the port 27017 (you can set the traffic source as anywhere 0.0.0.0/0 or as per your requirements).
Restart and Check the Status of Mongo Daemon
Restart:
$ sudo service mongod restart
Check the status:
$ sudo service mongod status
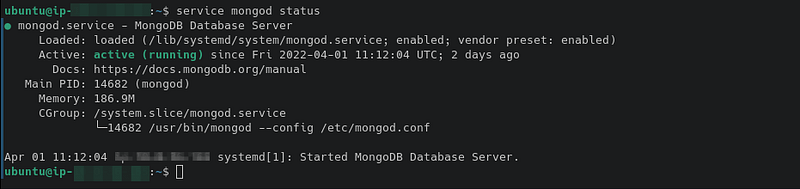
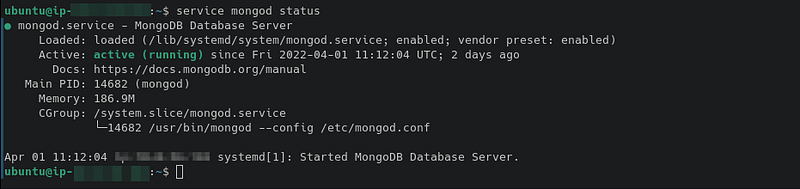
If anything goes wrong or not, you can always check the logs:
$ sudo tail -f /var/log/mongodb/mongod.log


Accessing MongoDB
Using Mongo Shell:
Access the remote Mongo Database we just set up:
$ mongo -u sagar -p my-password <Instance's public IP>/example_db
Here you go, now you can read and write within the example_db database without ssh.
Using Mongo Client:
Host = mongodb://sagar:my-password@<Instance's public IP>/example_db Port = 27017 (default)
Fix-1 Cannot access from other IPs
By default, the MongoDB server only allows connections from localhost(127.0.0.1). So, if you face an issue connecting the database, you can fix this by binding all IPs.
To allow connections from elsewhere in your VPC edit /etc/mongod.conf:
Look for the net line and replace bindIp value with 0.0.0.0, ::, to bind all IPV4 and IPV6 addresses, which is currently limiting MongoDB connections to localhost.
# network interfaces net: port: 27017 bindIp: 127.0.0.1 # change this to 0.0.0.0, to bind to all IP addresses
Note: make sure you have enabled authorization on security: section by adding authorization: 'enabled'(as we've already done above), to forbid the access to Mongo database on your server.
Restart the Mongo daemon(MongoDB).
Now, you’re good to go ahead.
Conclusion
In this tutorial, you have successfully learned to install MongoDB on EC2 and access from the shell as well as Mongo clients.
Thanks!
keep supporting!!


